Greetings! There were two new and exciting developments in the world of Second Life this week that deserve comment here...
The first is a new "Second Life Quickstart Guide" created by Linden Lab for new (and experienced) users. I find the guide somewhat akin to viewing an airplane safety manual (you'll know what I mean, I think, if you view the Quickstart guide), but it should prove useful to people learning about Second Life, etc.
You can view the guide here:
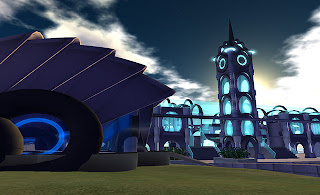
The second item from Linden Labs this week consists of new filtering options for adult content in Second Life. In education, it might be nice to search for items which do not involve the, ahem!, more "mature" locations and activities in Second Life... and these changes will start occurring. You can filter your searches for adult content (and, supposedly, filter your searches for only adult content!) From what I've been able to gather, it sounds like Second Life will now be split into "PG", "Mature" (R-rated, I'd guess) and "X-rated" spaces... sim owners/operators will have to pick and plan accordingly. An "Adult Only" continent is also being developed by Linden Labs (a "sneak peak" picture of which is provided at the top of this post)... interesting!!!
The filtering options will become available in June, although next week you'll be able to see some of them enacted using as unreleased as-of-yet Release Candidate viewer (http://secondlife.com/download).
You can read more about the new filtering system at these sites:
Both of these items should prove useful to educators and SL fans! :) See you in the metaverse; peace, -- Michael Russell (Mt. Hood Community College, SL: Regulus Darkstone)
You can view the guide here:
The second item from Linden Labs this week consists of new filtering options for adult content in Second Life. In education, it might be nice to search for items which do not involve the, ahem!, more "mature" locations and activities in Second Life... and these changes will start occurring. You can filter your searches for adult content (and, supposedly, filter your searches for only adult content!) From what I've been able to gather, it sounds like Second Life will now be split into "PG", "Mature" (R-rated, I'd guess) and "X-rated" spaces... sim owners/operators will have to pick and plan accordingly. An "Adult Only" continent is also being developed by Linden Labs (a "sneak peak" picture of which is provided at the top of this post)... interesting!!!
The filtering options will become available in June, although next week you'll be able to see some of them enacted using as unreleased as-of-yet Release Candidate viewer (http://secondlife.com/download).
You can read more about the new filtering system at these sites:
- http://m.apnews.com/ap/db_11704/contentdetail.htm?contentguid=71OtlRCA (From AP News)
- https://blogs.secondlife.com/community/community/blog/2009/04/21/update--upcoming-changes-for-adult-content
Both of these items should prove useful to educators and SL fans! :) See you in the metaverse; peace, -- Michael Russell (Mt. Hood Community College, SL: Regulus Darkstone)
